How to use Squarespace Email Campaigns [video]
Squarespace Email Campaigns allows anyone to gather email addresses, send marketing emails and analyze their email performance – all using the same Squarespace platform.
A huge benefit of the platform is being able to send emails that look just as good as your website. The design aesthetic is already integrated within Squarespace Email Campaigns.
In this tutorial I’m going to show you exactly how to choose a layout, customize the content and send your first campaign using Squarespace Email Campaigns.
One Page Love Exclusive Coupon
Yay! Squarespace has been kind enough to give One Page Love readers the exclusive coupon OPL10 for 10% Off* your first website or domain purchase. (There is a free 14-day trial with no credit card needed, so you can try risk-free.)
Please note: this article is based on the Squarespace 7.0 platform.
The new Squarespace 7.1 platform features an improved user interface, so the screenshots might differ but the majority of the content is still relevant. Squarespace 7.1 offers a much more flexible way to build websites, regardless of which template you start with. Squarespace 7.1 templates also support all features and style options including an unlimited number of page sections.
Step One – Create a mailing list
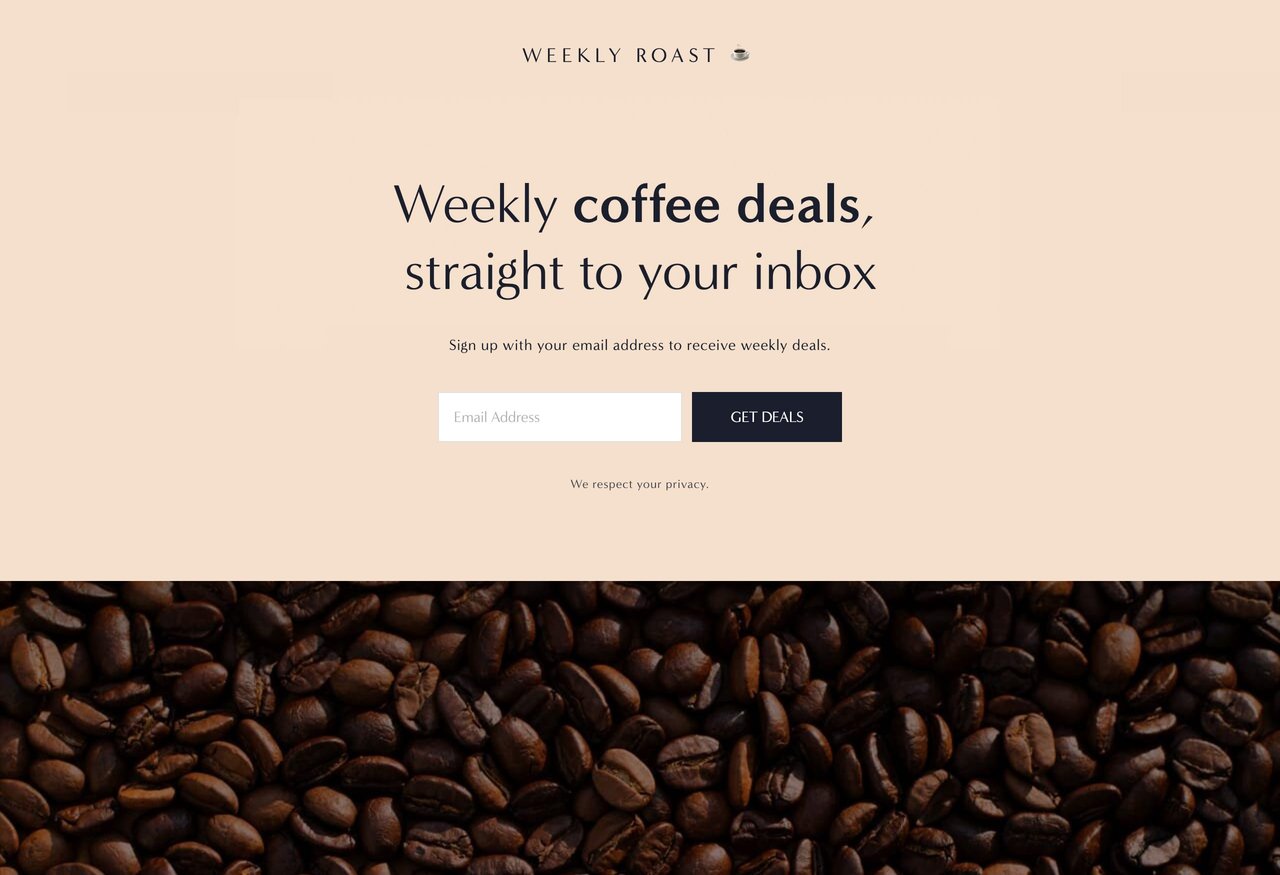
We need to create a mailing List to store our subscribers. For better context for this tutorial, I’ve created a Landing Page promoting a fictitious weekly newsletter called the Weekly Roast:
The video tutorial embedded above details how to insert the mailing list sign up block but also find a more comprehensive tutorial here on How to create a Newsletter Landing Page with Squarespace.
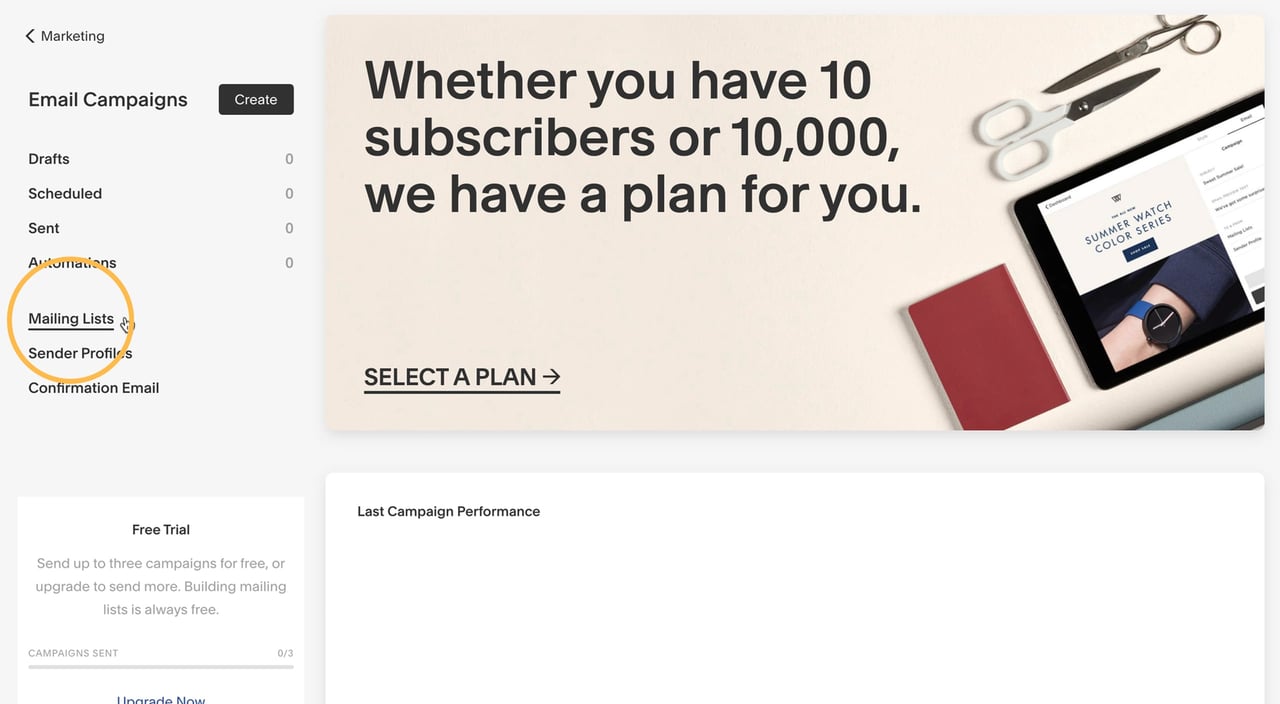
Head on over to the Marketing section within the Squarespace main navigation > Email Campaigns > Mailing Lists:
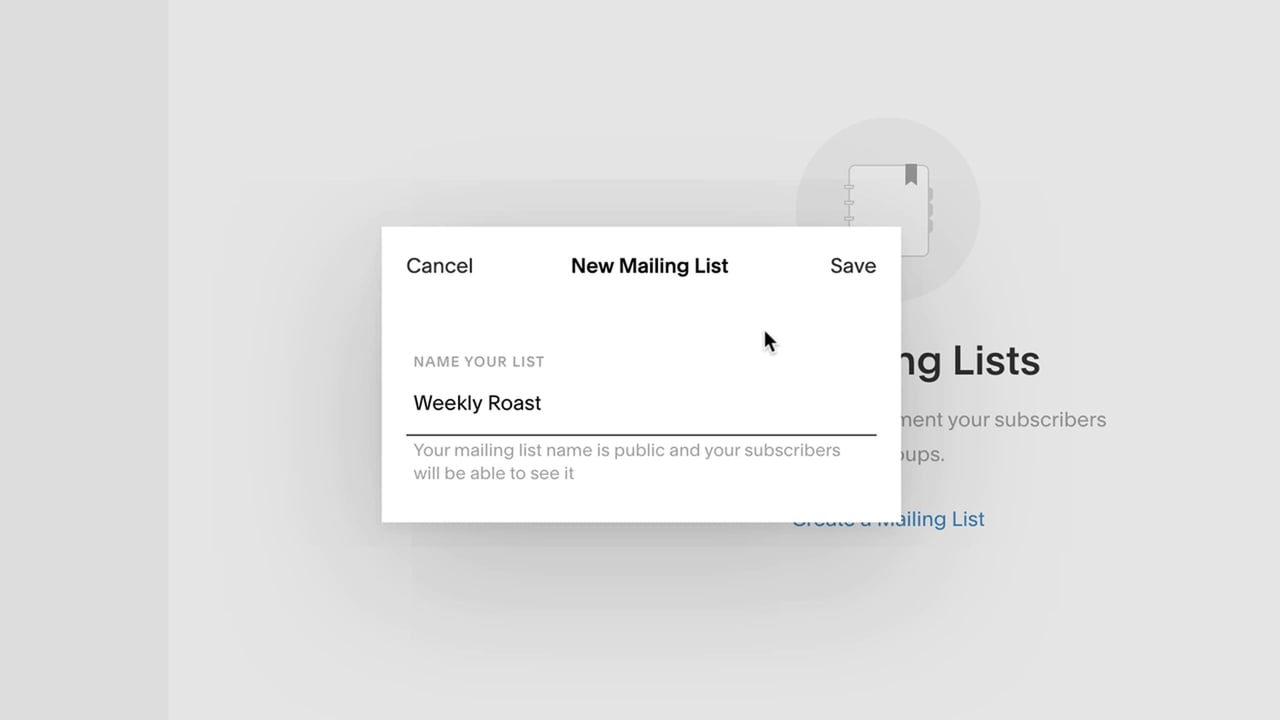
Steer over to the center of the page and click create a mailing list.
I’m calling mine Weekly Roast:
Press save.
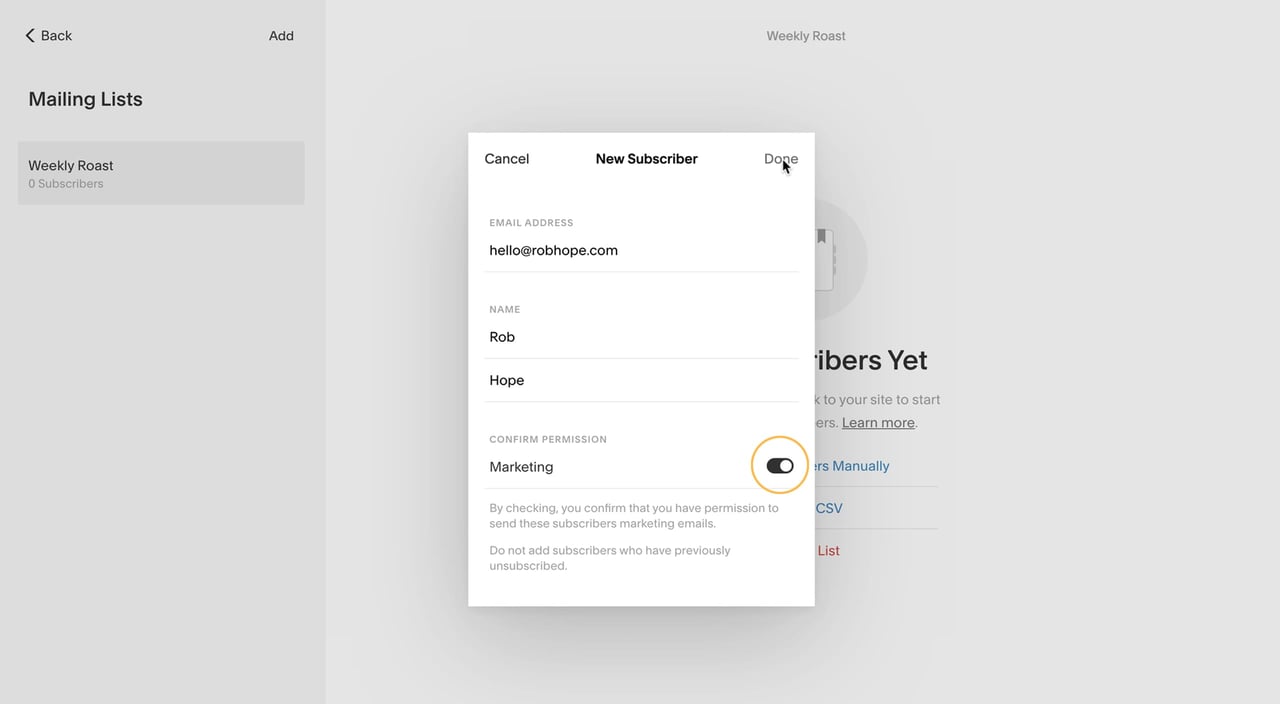
There is a real neat option to import full CSV files filled with emails but in this tutorial I’m going just add 1 subscriber manually. Remember to only add sub subscribers who have opted into your marketing communication, as highlighted here:
Once added, you get a glimpse into your mailing lists activity in a neat dashboard. This really gets exciting over time.
Step Two – Add sender profile
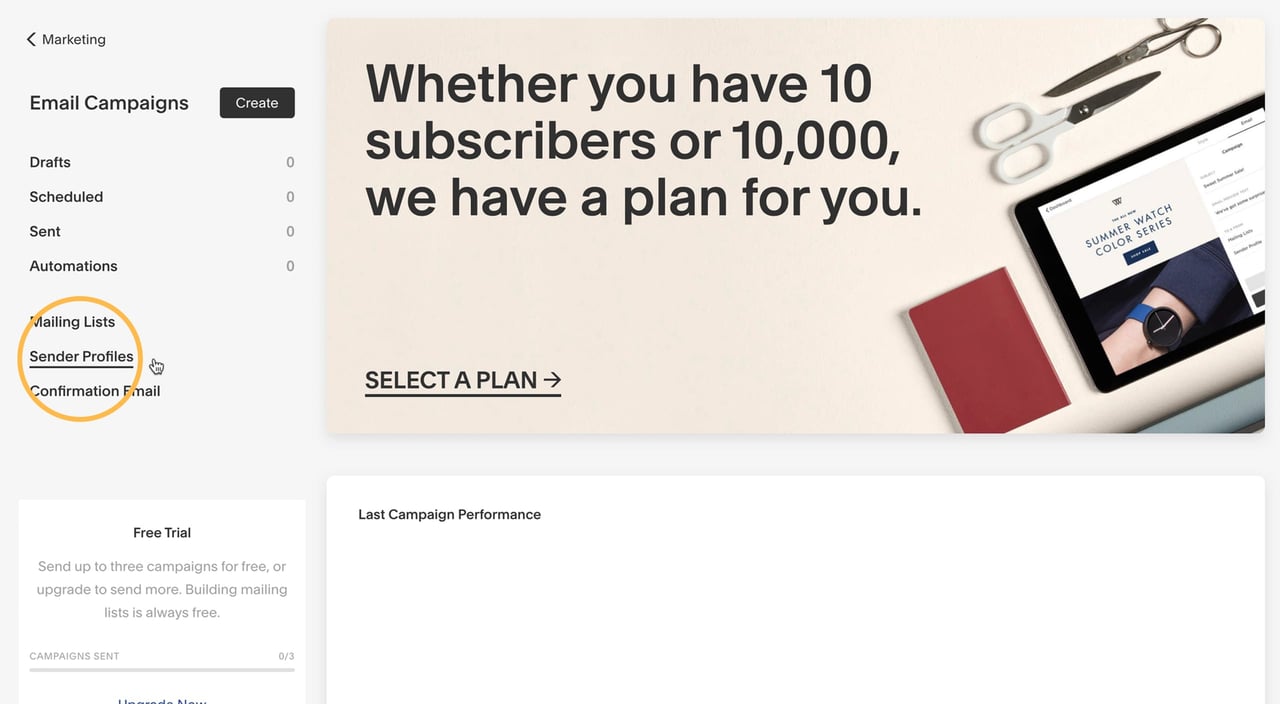
Head back over to Marketing > Email Campaigns then open up the Sender Profile settings:
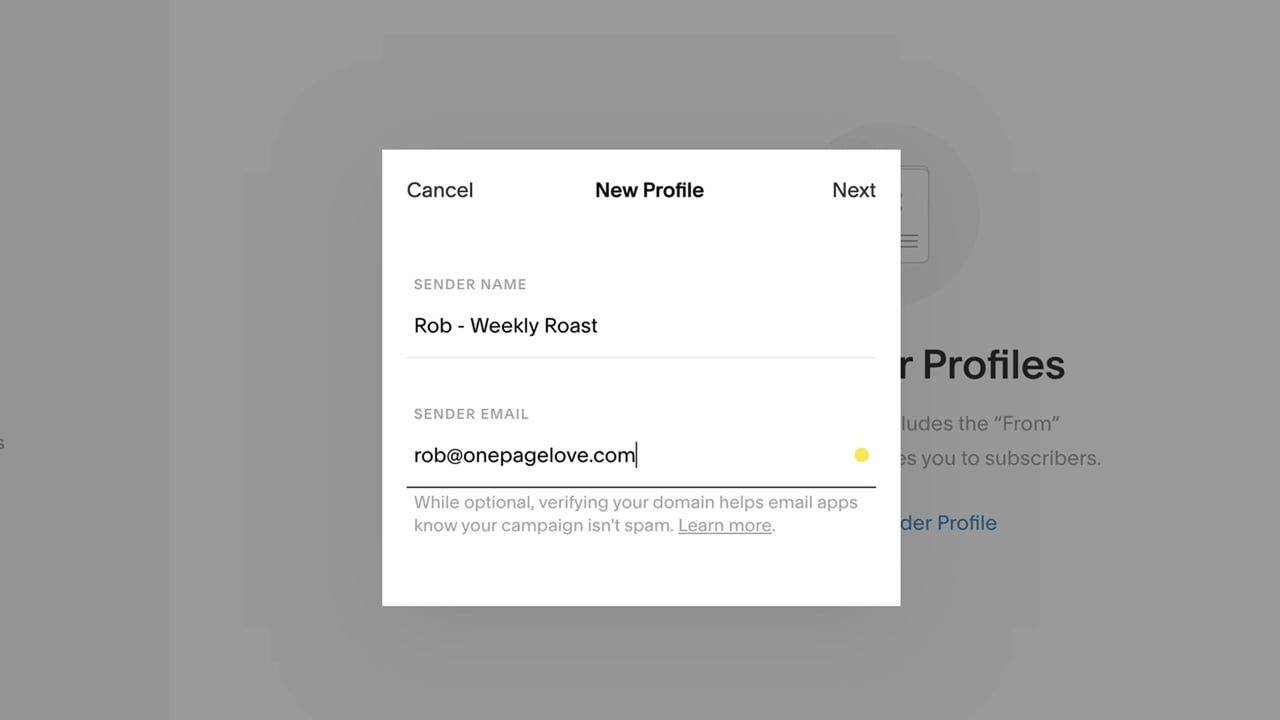
Create your profile then hit Next. You’ll notice an orange warning dot:
This is because you haven’t verified your email address. Check your inbox, copy the code, head back, paste it in and hit Next. You are now verified.
The final step is Domain Authentication. It’s optional but I’d recommend it as it lessens the chance of your email campaigns arriving in spam folder.
We’re now ready to roll.
Step Three – Create a campaign
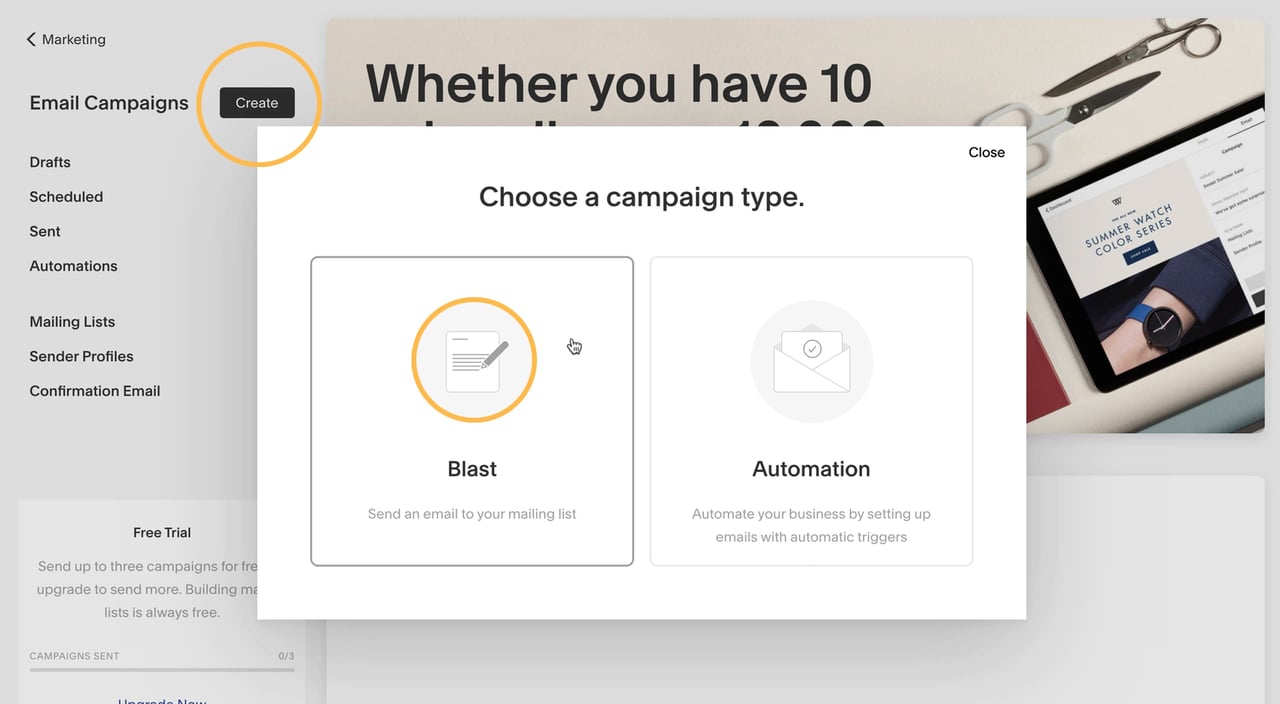
Head on back to Email Campaigns and smash the Create button. Then choose the Blast option as this is a once-off email:
Step Four – Choose a layout
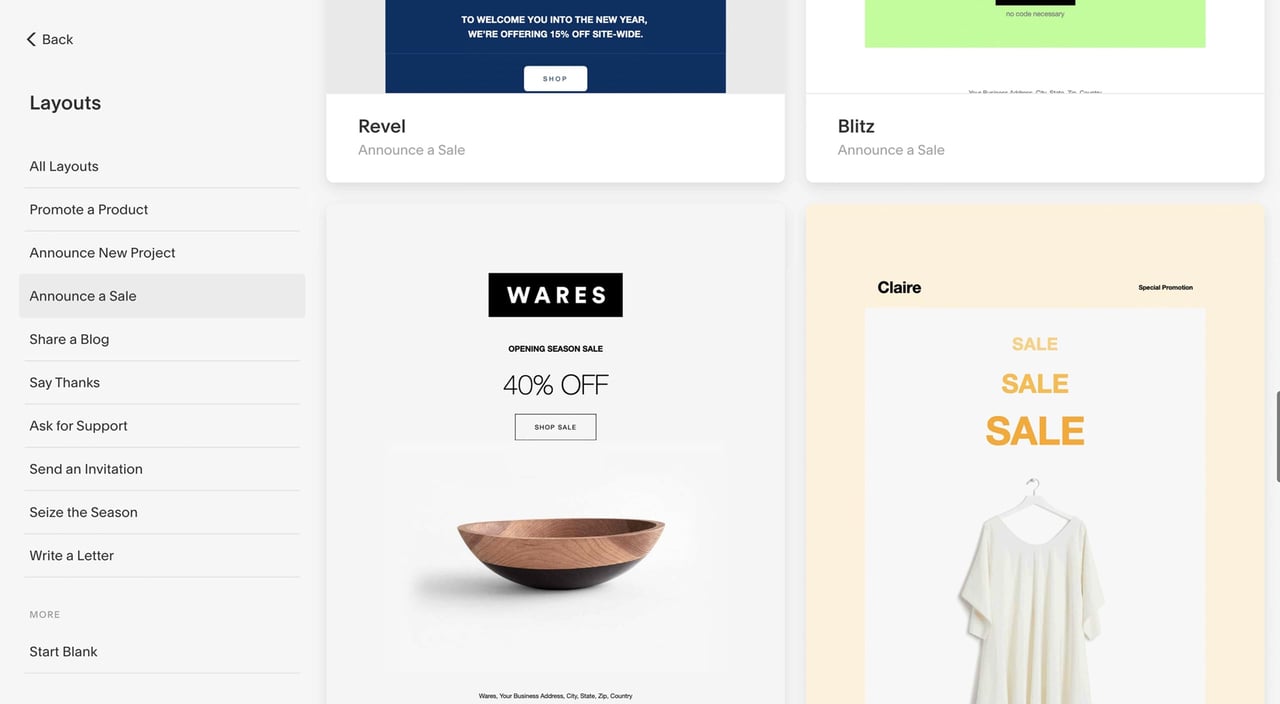
There are literally dozens to choose from but a good tip is try match your use-case to the Layout categories.
I want to send a coffee deal, so I’m going to browse by ‘Announce a Sale’ where I’m after a minimal layout with a CTA button followed by my coffee bean image. The Wares layout looks perfect:
Remember these layouts are all starting points and customization is unlimited. Simply click the layout to begin editing.
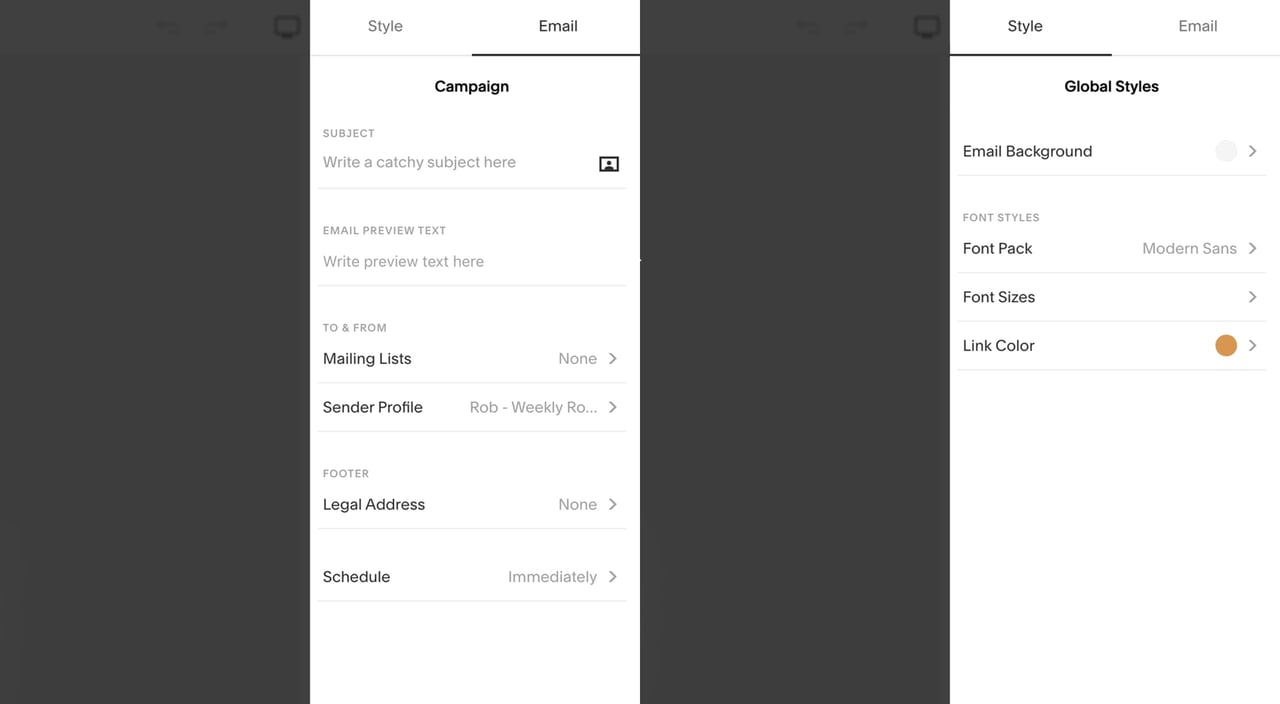
To quickly run your through the Email Campaign editor… the left is of course your email design with a neat mobile preview feature. To the right is your editor bar with two main functions. Email Campaign sending details and Email Styles for customization:
Step Five – Edit content
I’d highly recommend watching the video for a better guide on editing content and customization. Here is the video again timestamped at the start of the editing chapter:
In the video we replace all text and images with our own by simply editing inline.
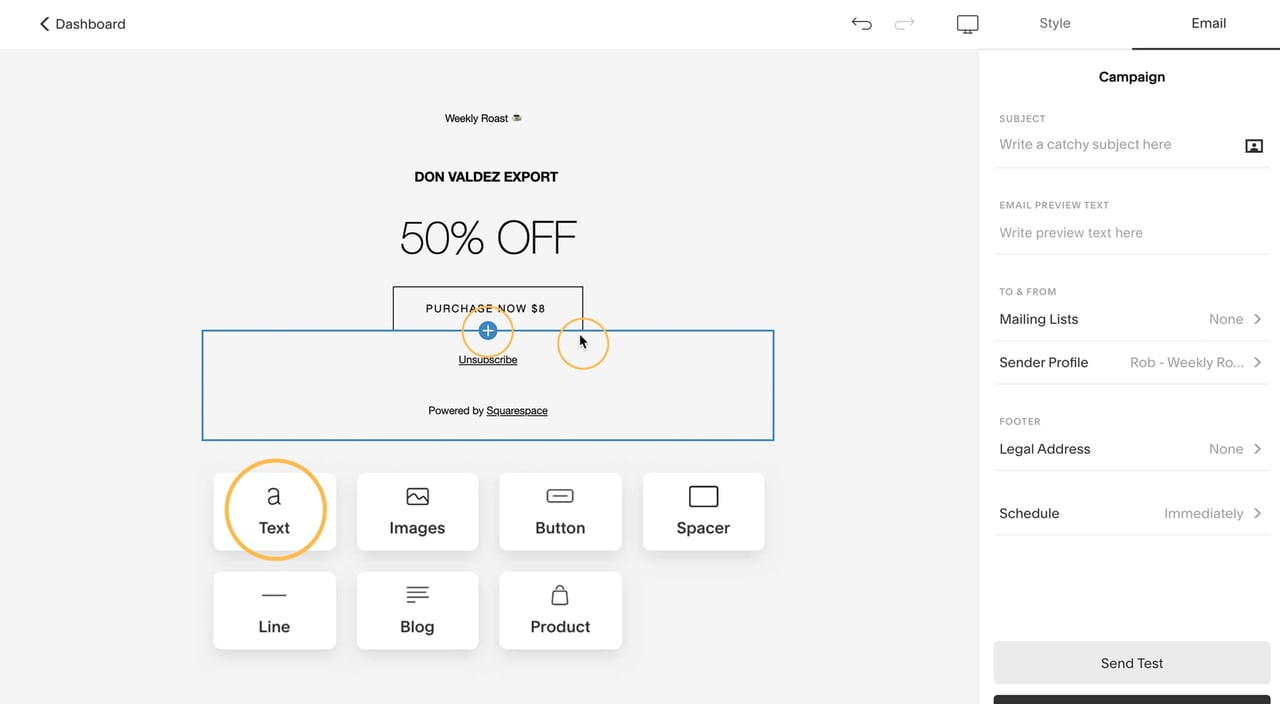
To add content blocks, you simply hover over the email section you want to add content and press the plus icon to kick off the options (shown below). There are options for text, images, buttons, spacers, lines and you can even import existing Squarespace blog posts and products:
Once we are happy with the content it’s time to customize.
Step Six – Customize content
The UI is very intuitive, simply start by selecting the elements to the left then customization on the right:
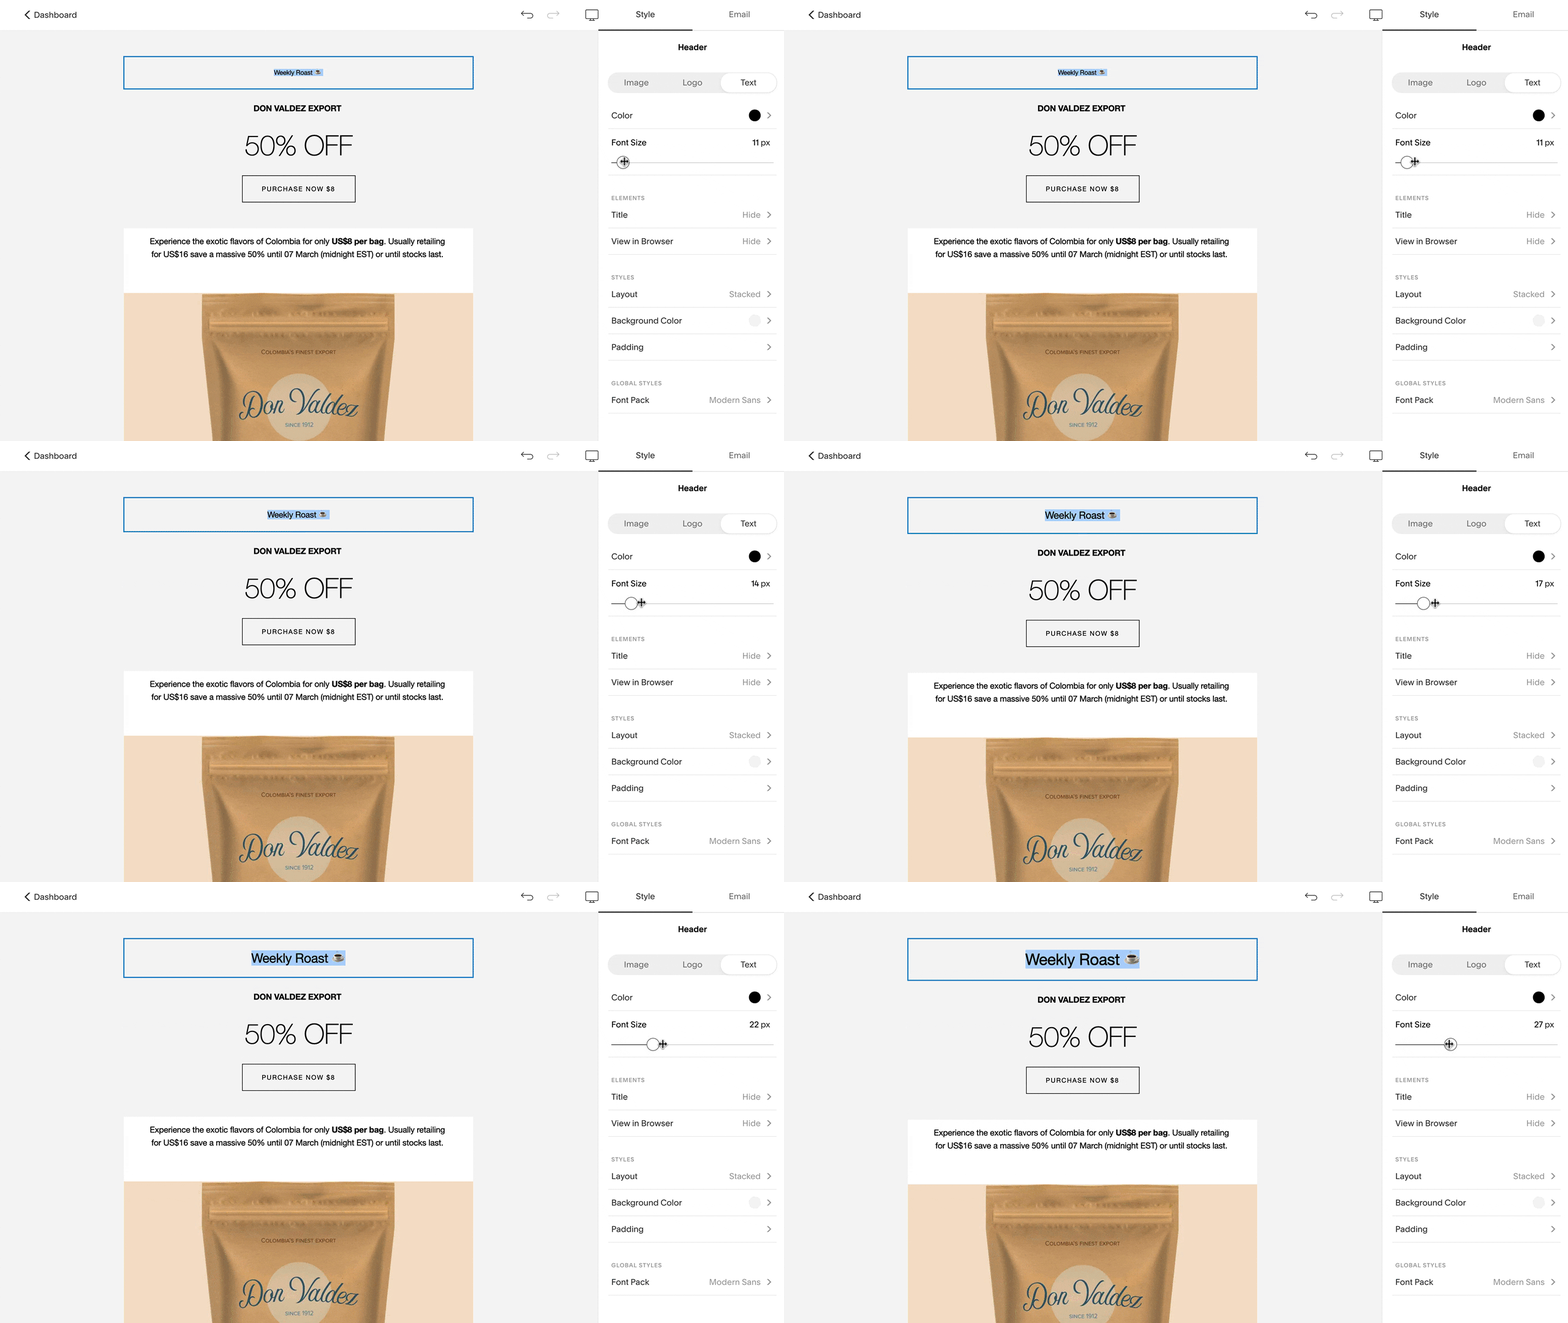
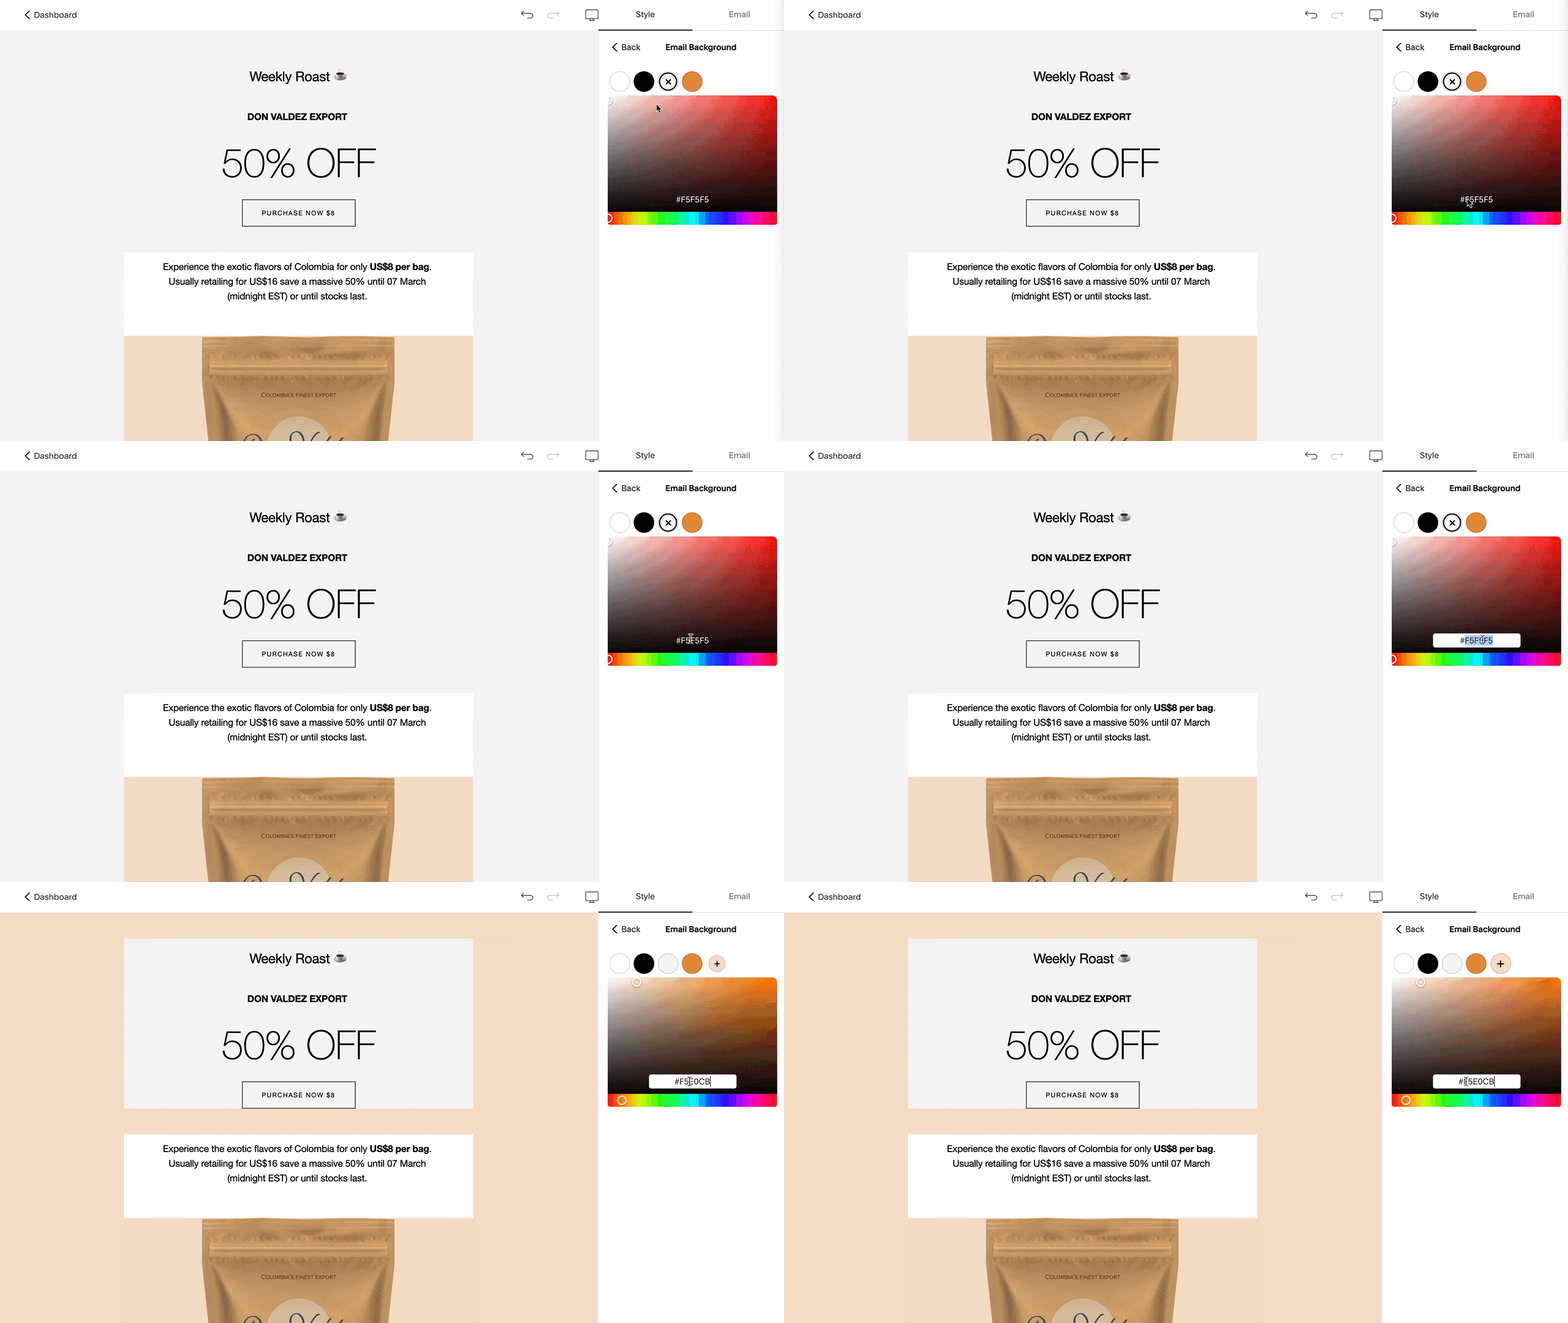
I’m now happy with the font size, let’s change this email background to match my brand colors. Kick off the background color picker to the right and simply drop in your brand HEX color code over the colors like this:
Now you’ll notice this email layout has white color background area for the central content. We just need to select each item on the left and assign the transparent background color setting on the right using the striped icon:
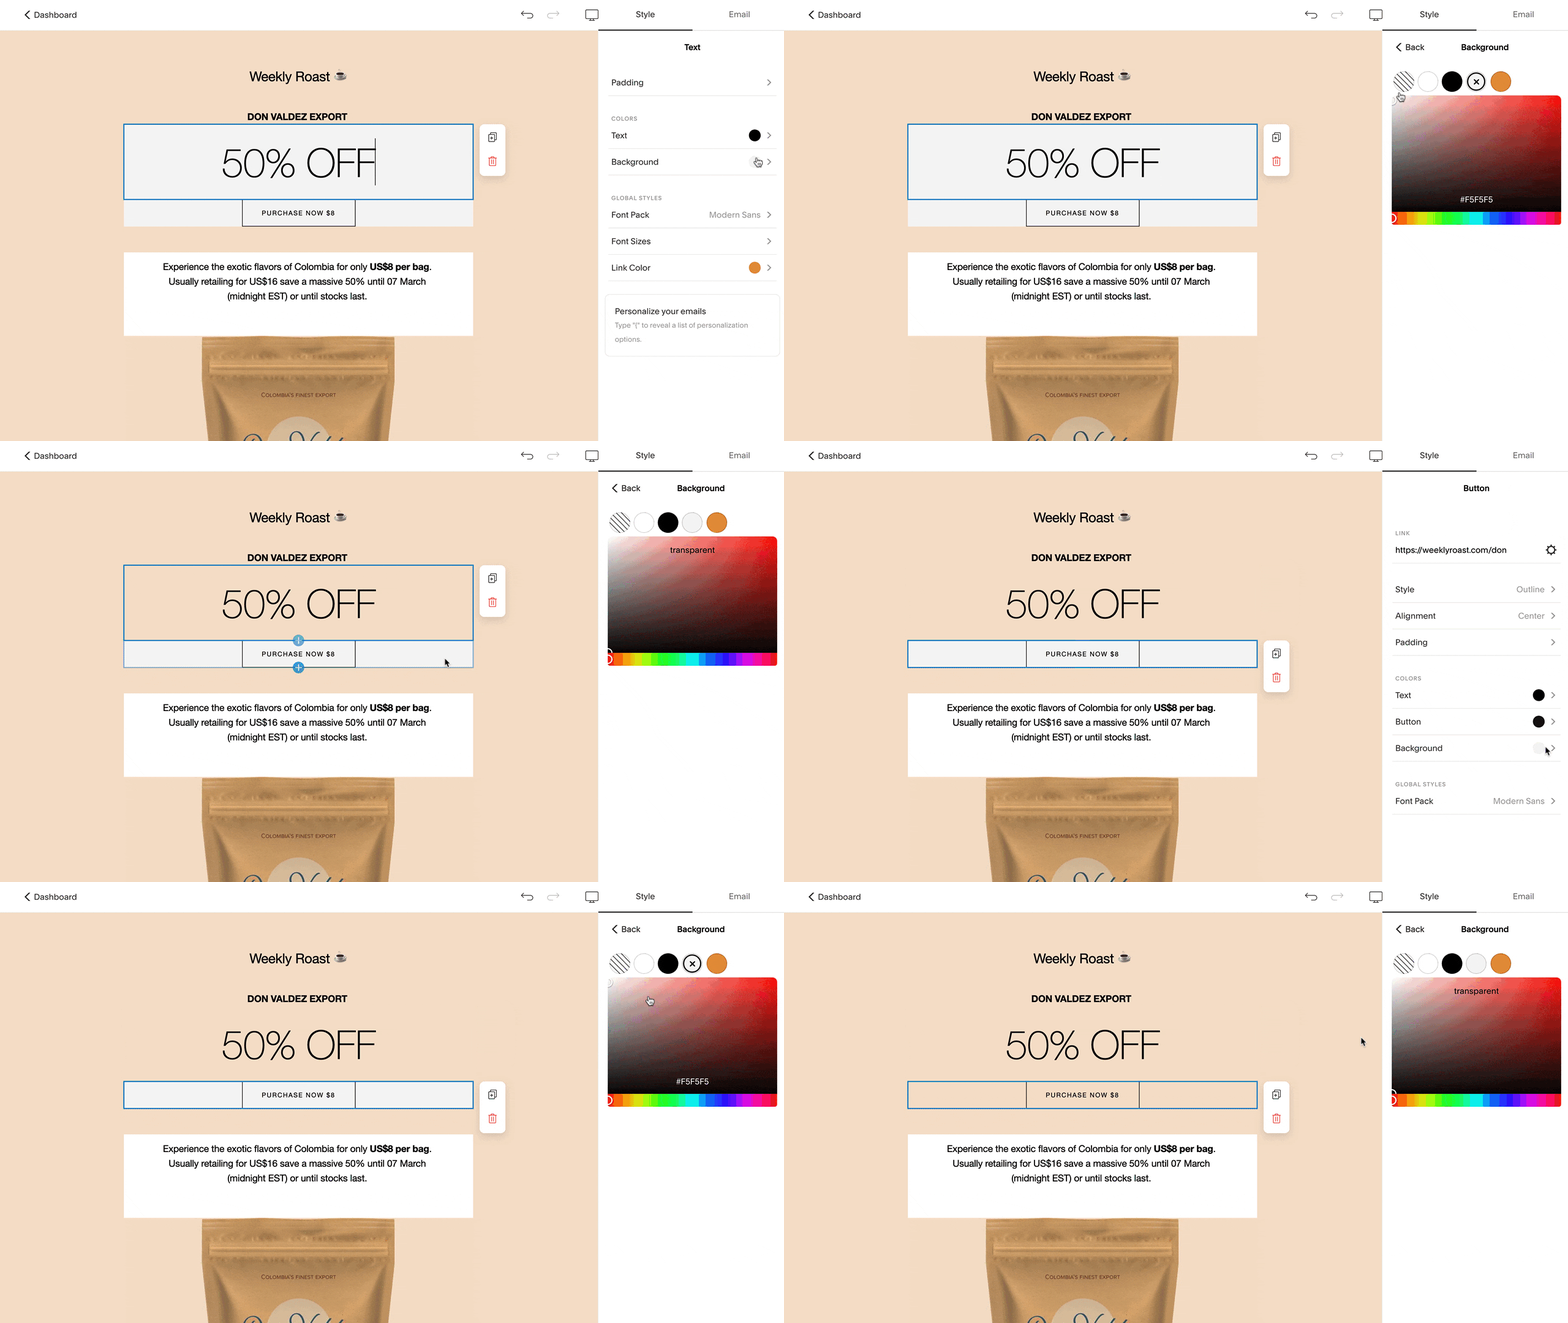
Continue to edit all the elements as you need using the panel to the right.
Step Seven – Prepare the email
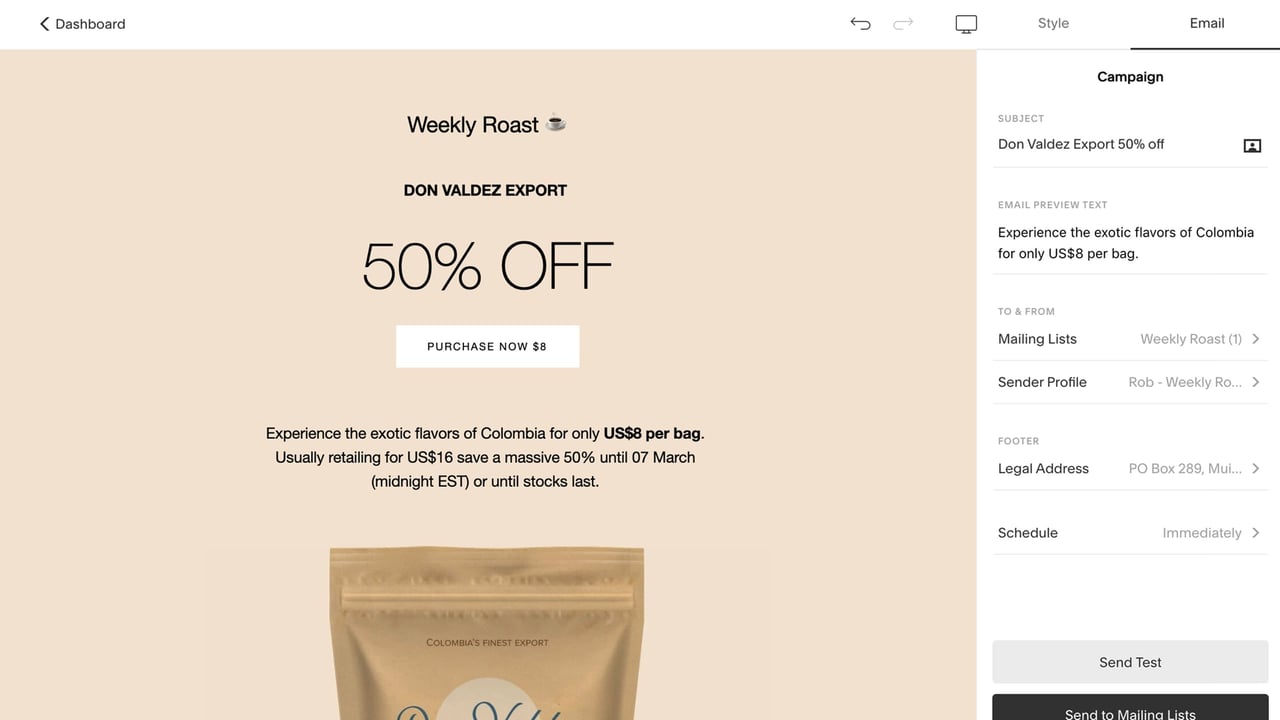
Head over to the Email Campaign tab:
- Set the Email Subject.
- Add Email Preview text – this is the addition snippet that shows up in condensed inbox list views.
- Select your Mailing List (we created in Step One)
- We’ve already set our Sender Profile (in Step Two).
- Then finally add the legal address of your business for the email footer.
Step Eight – Send a test email
The final step is to send a test email to yourself or work colleagues to get a fresh set of eyeballs on the email campaign. Press the Send Test button at the bottom of the right panel, enter in an email and send the test.
Once confirmed it’s ready to go we simply hit the Send to Mailing List button (below the previous Sent Test button) and your email will be sent safely using Squarespace Email Campaigns.
FAQ: What are the benefits of using Squarespace?
Squarespace is a leading online website builder. What sets them apart is their superior level of design and award-winning customer support team available 24/7. Other main benefits are:
- No Website Hosting Needed - their platform is fast and secure.
- Online Content Management - all edits are done within your browser, no software needed.
- Easily Drag and Drop Images - unlimited galleries with unlimited bandwidth.
- Free Domain Name - when registering for your first website, if you pay annually (renews at standard rate).
- Beautifully Responsive - all templates work for all devices, so you only have to design your website once. Test and preview how your website will appear on a range of screen sizes.
- Blog Sections - can easily be added for content marketing and to share your journey.
- Commerce Solutions - are an upgrade away if you want to start selling products.
- Email Marketing - gather email addresses, send marketing emails and analyze the reader email activity.
- Member Areas - create private website sections only accessible to signed-up or paying members.
- Scheduling - add an online scheduler to your site to diversify your revenue with professional services or classes.
That’s a wrap! Don’t forget your 10% Off coupon*: OPL10
That’s a wrap! Don’t forget your 10% Off coupon: OPL10
I hope you enjoyed this tutorial on how to send your next campaign using Squarespace Email Campaigns. Props to Squarespace for creating a platform where we can create beautiful announcement websites, easily. In case you missed it last month, I curated 10 Squarespace Portfolio Templates to showcase your talent in 2020.
* The OPL10 coupon offer only applies to first payment of subscription on Squarespace, does not apply to future recurring payments or monthly plans, and may not be combined with any other offer codes or discounts.
Much love,
Rob
Twitter: @robhope
Email: [email protected]



![How to create a free link in Bio Site in minutes [video]](https://assets.onepagelove.com/cdn-cgi/image/width=780,height=412,fit=cover,gravity=top,format=jpg,quality=85/wp-content/uploads/2022/07/sqsp-thumb.jpg)

