![]()
This year (and especially last month) has been unexpectedly challenging.
A few readers have been emailing in saying they are feeling pressure to think of new ways to conduct business, especially remotely, to maintain cashflow. This lead me wanting to provide an easy-to-start guide for anyone looking to sell their products or services online.
For the past 3 years, One Page Love has had an amazing partnership with Squarespace, and it’s a brand I always recommend when people ask for a website builder that just works.
So it made sense to partner with Squarespace on this article, to show you how you can use their all-in-one platform to build a beautiful website for under $20/month and begin selling online!
Tutorial Index:
- Signing up
- Choosing an Ecommerce template
- Connecting a payment processor
- Adding products
- Launching your website
- Bonus: 10 ideas to increase sales!
One Page Love Exclusive Coupon
Yay! Squarespace has been kind enough to give One Page Love readers the exclusive coupon OPL10 for 10% Off* your first website or domain purchase. (There is a free 14-day trial with no credit card needed, so you can try risk-free.)
Step One – Sign Up at Squarespace
Ecommerce functionality is available on three tiers: Business, Commerce Basic and Commerce Advanced, with Business plans starting at $23 per month. Remember this $23 includes all hosting, security, speed optimization and content management – it’s quite a deal.
This Business plan is a great place to start and includes full Ecommerce functionality, unlimited products, donations, a 3% transaction fee and temporarily gift cards (until 01 September 2020).
It’s also good to know when your Ecommerce business really takes off, upgrading your plan can unlock features like:
- Subscriptions
- Abandoned Cart Recovery
- Real Time Carrier Shipping
- Flexible Discounts
- 0% transaction fees
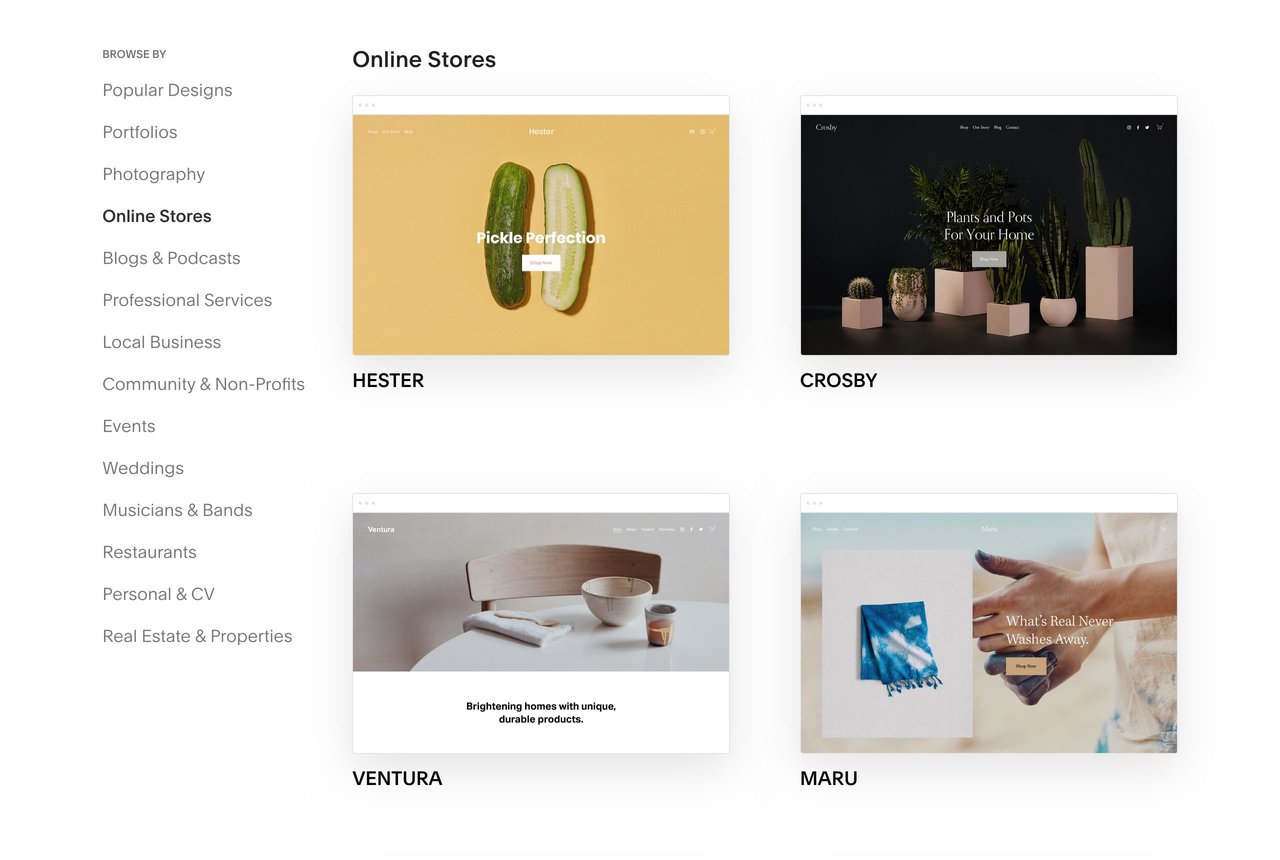
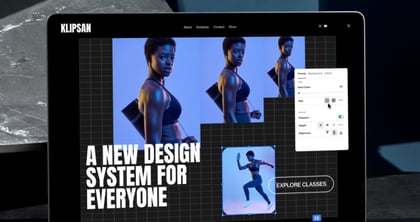
Step Two – Choose an Ecommerce template
In order to create your digital “storefront” you need to begin by choosing a website template. Ecommerce functionality is available on any template and Squarespace offers at least a dozen pre-design Ecommerce-first templates to get you going faster. It’s also worth noting these “Online Store” templates are optimized for commerce, but any Squarespace template will allow you to sell.
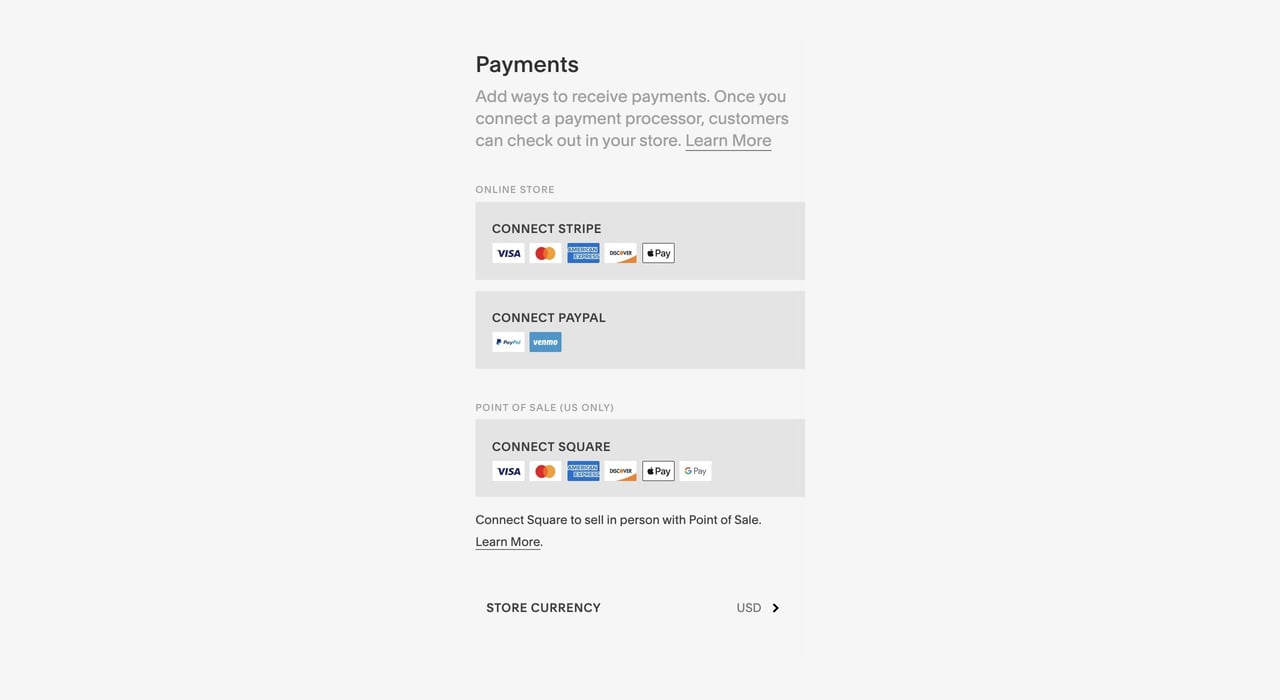
Step Three – Connect a payment processor
Squarespace integrates with industry leading payment processors to take payments through your Ecommerce store.
If you’d like to connect Stripe, you can then process payments from customers paying with Visa, Mastercard, American Express, or Discover cards (US only). If you add a PayPal account, customers will be allowed to pay with their own PayPal account or Venmo.
If possible, I’d recommend adding both Stripe and PayPal so you can give your customers as many payment options as possible.
Head over to Menu → Commerce → Payments and connect the processors of your choice:
Step Four – Add your first products
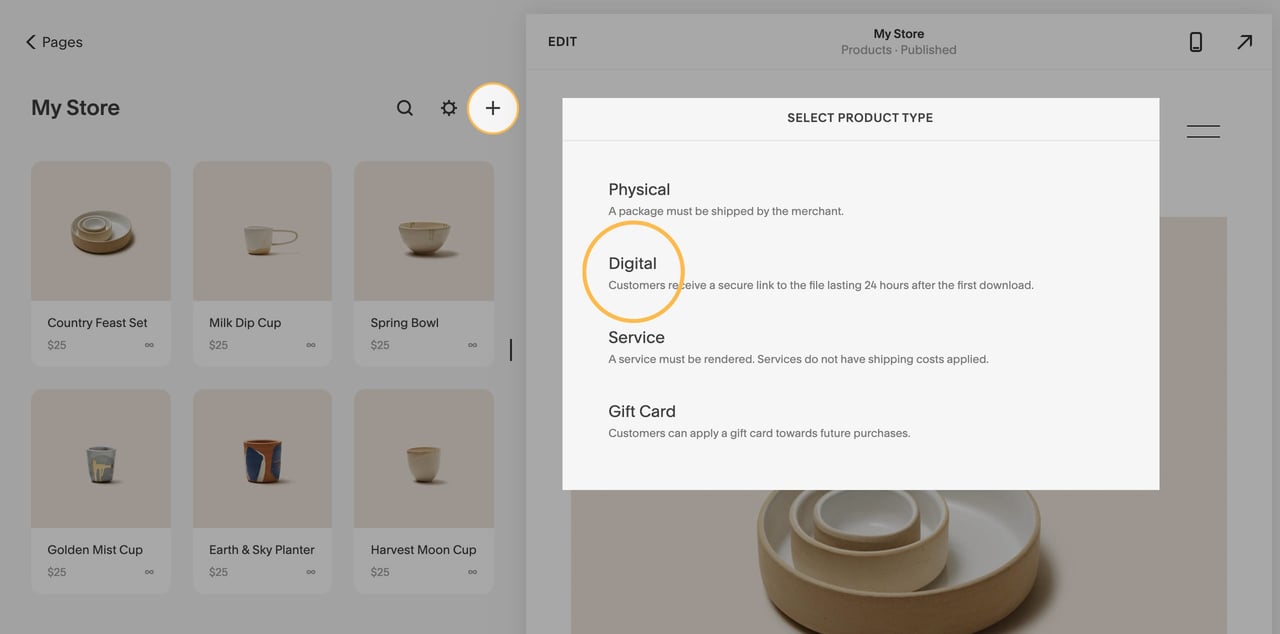
There are four types of products you can add to your Squarespace website:
- Physical Products – Merchandise, apparel, and any other physical goods that you ship or deliver to customers. These can be a one-time purchase, or a subscription. If you sell physical products, you’ll need to add at least one shipping option to your store.
- Digital Products – Ebooks, audio files, and any other digital downloads you sell. When a customer purchases a digital product, they’re sent a download link that’s active for 24 hours after the link is first clicked.
- Services – Classes, consultations, events, or any other service you offer. Unlike physical goods, service products aren’t shipped to customers, so they don’t require shipping methods or a shipping address at checkout
- Gift cards – Gift cards are unique digital codes that recipients can use as payment in your online store. They are a great way to increase cashflow from your previous customers. The customers can purchase a Gift Card now and redeem the deal at a later stage, knowing you have delivered a great service in the past.
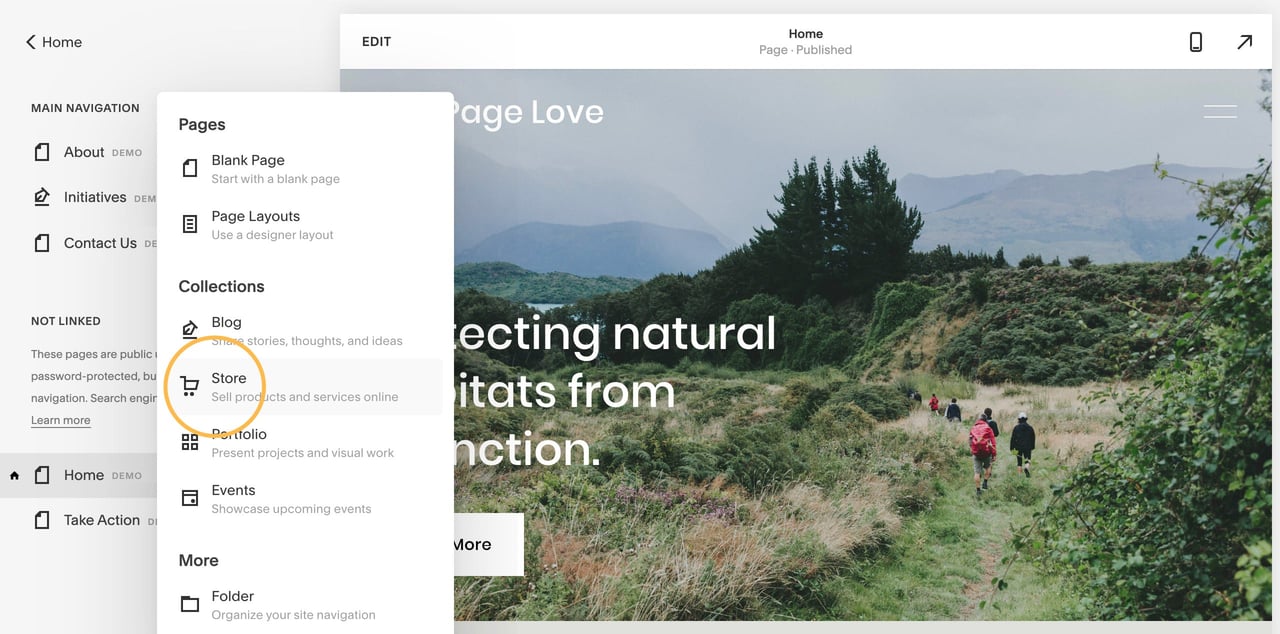
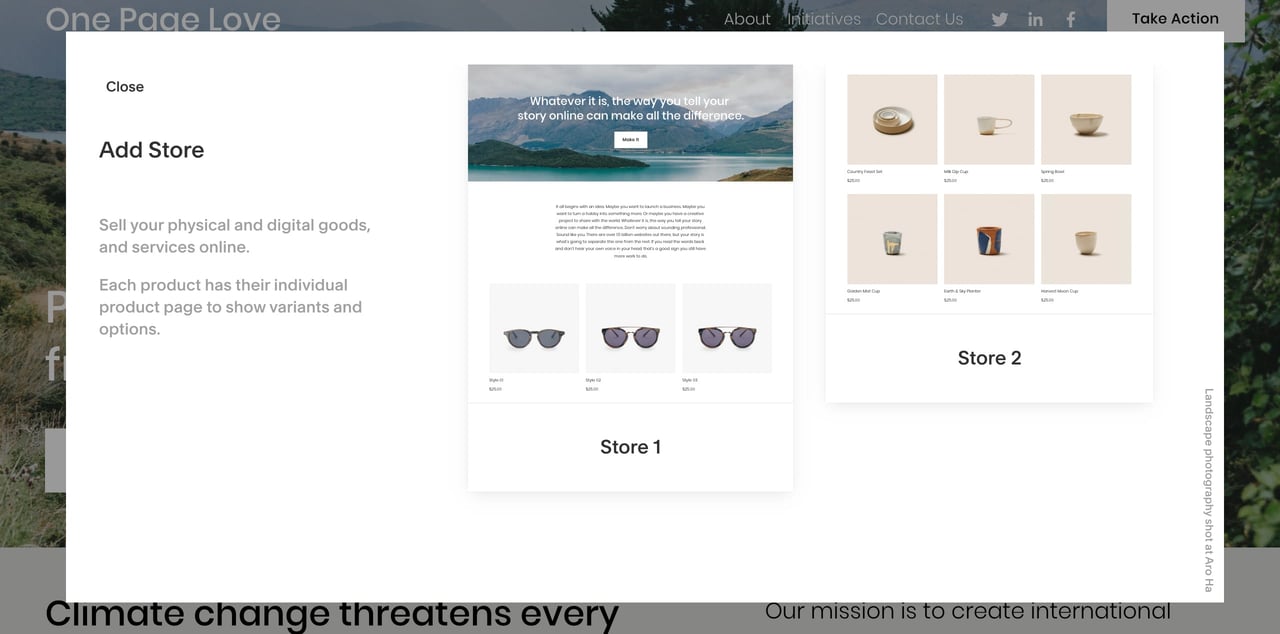
To add your first product, head over to Menu → Pages then click the + icon next to Main Navigation. In the pop-up page options, select the Store option under Collections:
You now have two different Store designs to choose, I chose the minimal Store 2 option:
When prompted name the new store accordingly, I just named mine My Store. Now click the + icon to launch the Product setup process. Here are the 4 types I detailed earlier, in this tutorial I’m going to add a Digital Product.
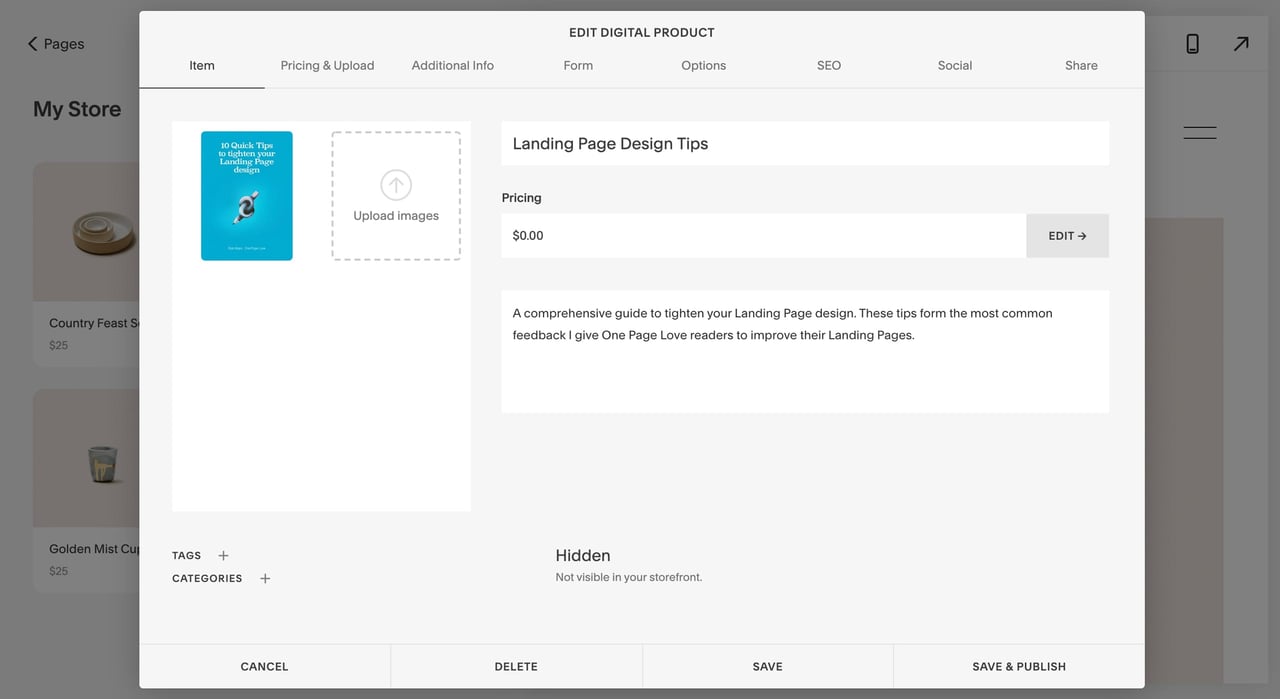
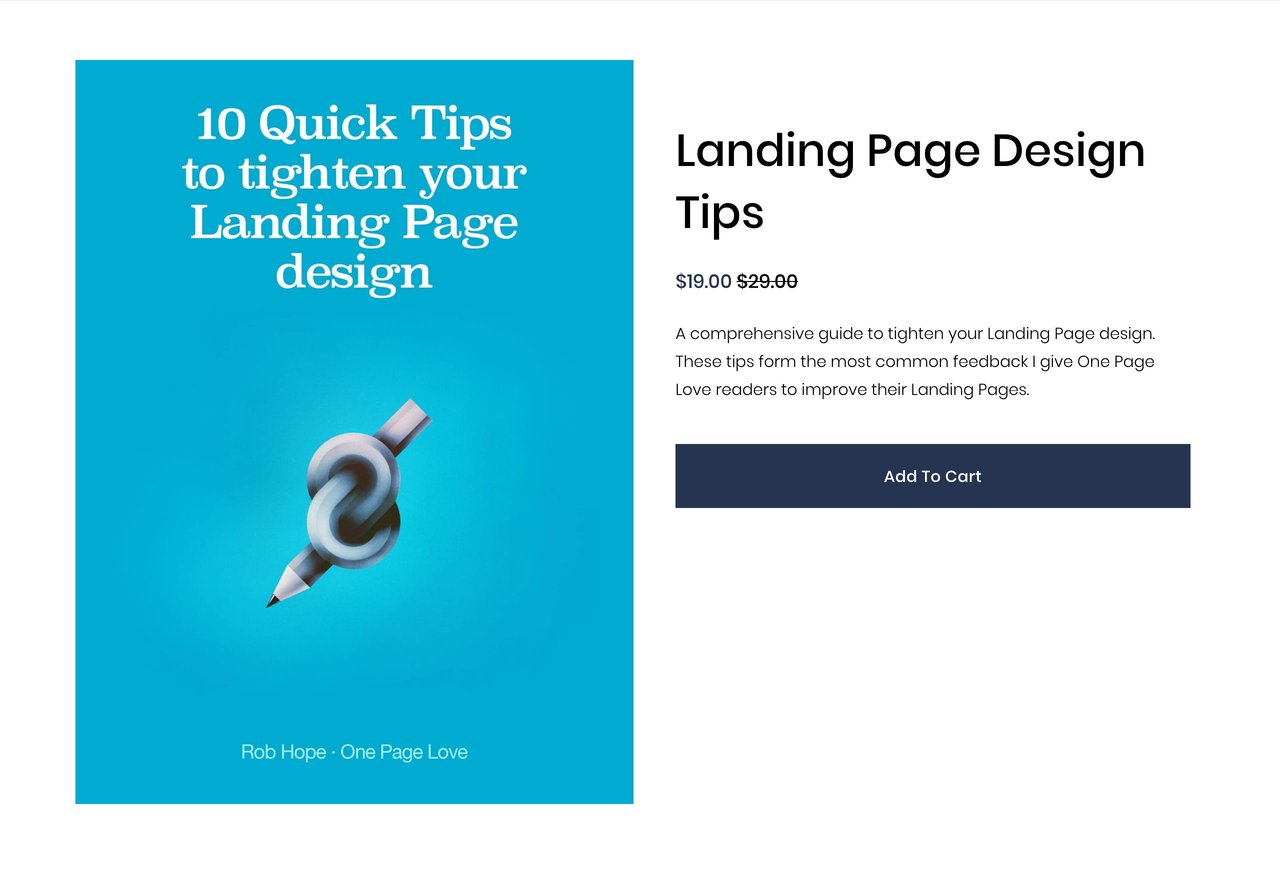
Proceed to go through the tabs adding your product information. The Item tab includes an image representing your digital product, the name and the overview:
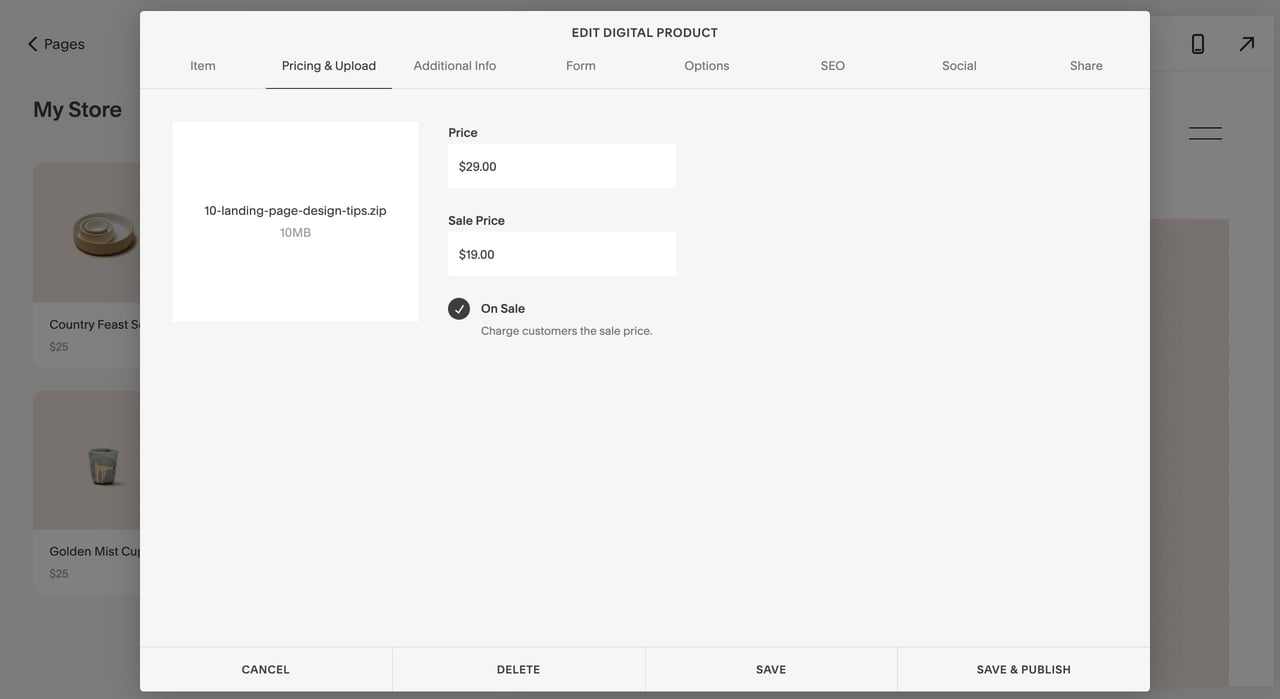
Moving on to the Pricing & Uploading tab I upload my Ebook zip file and set the pricing. Note how I’ve set a sale price of $19, discounted from $29:
Proceed to complete the rest of the tabs then hit the Save & Publish button bottom-right. Here is what our published Ebook looks like within the Ecommerce template design I choose:
Simply repeat this product until you have all your products listed online. It’s actually quite an exciting process!
Step Five – Launch your new website
Once you are happy with your product offering, you can transfer your custom domain to your Squarespace website. If you don’t have a domain you can register a new domain through Squarespace and may even be eligible for a free domain for one year if you choose an annual billing plan for a new Squarespace website.
You are now ready to share your website with your audience! Here are some bonus tips I put together to help get going:
Bonus: 10 ideas to increase sales and traffic to your Squarespace website
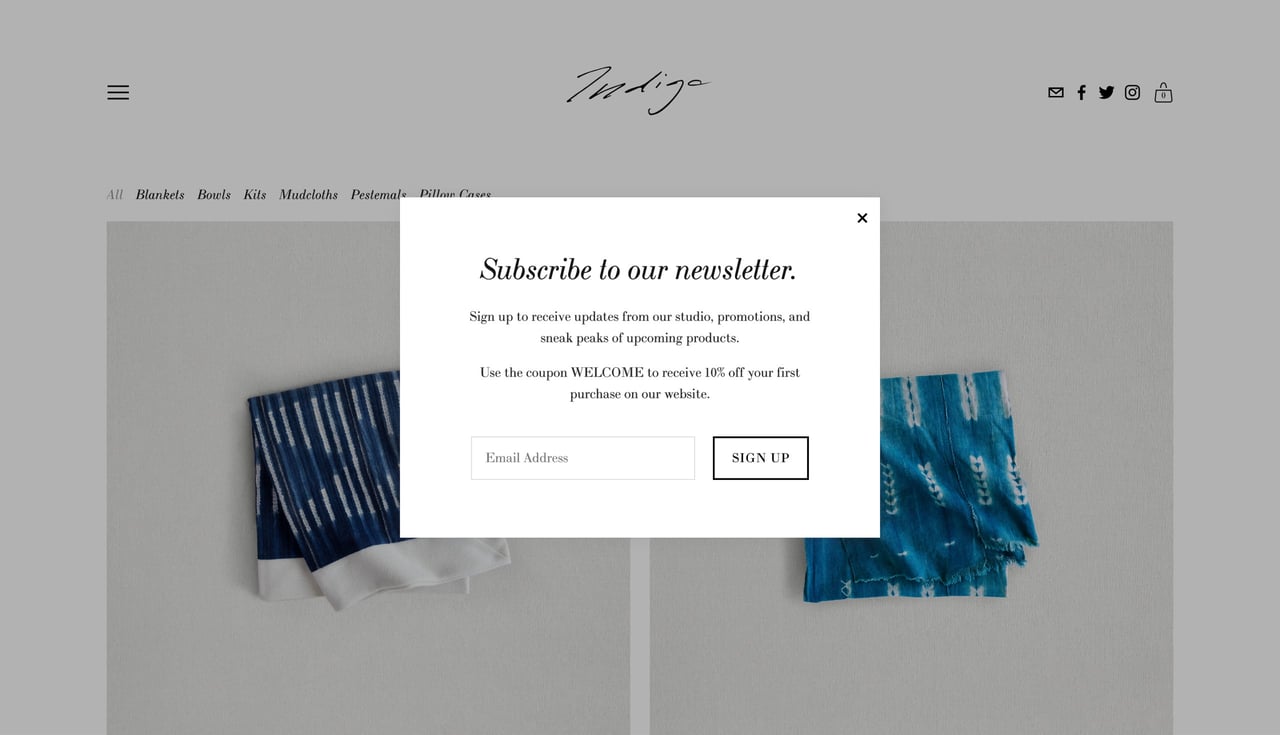
- Discounts – Try offering discounts to new customers visiting your website. You can easily set up a promotional pop-up or header banner encouraging them to take advantage of a special offer using a Coupon Code like WELCOME. Coupons are also great to track your marketing efforts, using a different coupon on different social networks to see which performed best.
- SEO – Optimise your website for search engines and start ranking higher in potential customer search results.
- Gift Cards – Gift Cards are a great way to increase cashflow. Mentioned above in the Products step.
- Newsletters – Start a mailing list using Squarespace and start sending product announcement newsletters using Squarespace Email Campaigns. Each send guarantees a boost of website traffic.
- CRM Software – Strengthen customer relations with CRM software by integrating your Squarespace account with Zapier.
- Google Ads – When you sign up for a Squarespace Online Store, you get a free $500 Google Adwords Credits (offer valid in the US and Canada for new Google Ads customers after spending the first $500).
- Facebook Dynamic Ads – You can also use Facebook Dynamic Ads to help you target new customers by promoting products in your inventory relevant to their interests.
- Landing Pages – Considering sending your customers to a specific product Landing Page (opposed to your home page) optimized with copy and images related to your advertising efforts.
- Social Media – You can connect your account to your main social media accounts allowing easy sharing of your products by you and your customers browsing the website.
- Analytics – Squarespace Analytics offers a range of statistics and performance views. Over time your can see which products aren’t performing well, then try improve their imagery and copy – optimizing your product offering.
FAQ: What are the benefits of using Squarespace?
Squarespace is a leading online website builder. What sets them apart is their superior level of design and award-winning customer support team available 24/7. Other main benefits are:
- No Website Hosting Needed - their platform is fast and secure.
- Online Content Management - all edits are done within your browser, no software needed.
- Easily Drag and Drop Images - unlimited galleries with unlimited bandwidth.
- Free Domain Name - when registering for your first website, if you pay annually (renews at standard rate).
- Beautifully Responsive - all templates work for all devices, so you only have to design your website once. Test and preview how your website will appear on a range of screen sizes.
- Blog Sections - can easily be added for content marketing and to share your journey.
- Commerce Solutions - are an upgrade away if you want to start selling products.
- Email Marketing - gather email addresses, send marketing emails and analyze the reader email activity.
- Member Areas - create private website sections only accessible to signed-up or paying members.
- Scheduling - add an online scheduler to your site to diversify your revenue with professional services or classes.
That’s a wrap! Don’t forget your 10% Off coupon*: OPL10
That’s a wrap! Don’t forget your 10% Off coupon: OPL10
I hope you enjoyed this tutorial on how to start selling online with Squarespace. Props to Squarespace for creating a platform where we can create beautiful Ecommerce websites, easily. In case you missed it last month, I rounded-up 5 considerations when picking an Ecommerce Website Builder.
* The OPL10 coupon offer only applies to first payment of subscription on Squarespace, does not apply to future recurring payments or monthly plans, and may not be combined with any other offer codes or discounts.
Much love,
Rob
Twitter: @robhope
Email: [email protected]


![How to create a free link in Bio Site in minutes [video]](https://assets.onepagelove.com/cdn-cgi/image/width=420,height=222,fit=cover,gravity=top,format=jpg,quality=85/wp-content/uploads/2022/07/sqsp-thumb.jpg)